Making Garden Beds
We hope you enjoy this weeks Main Article: 'Making Garden Beds'
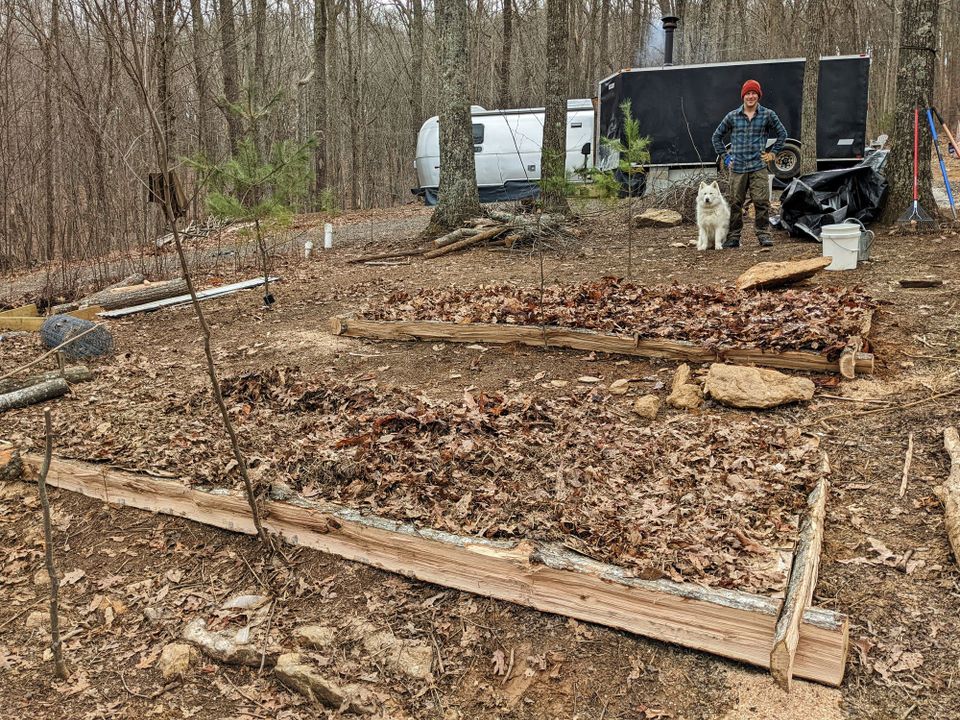
This is our third year of gardening. As you saw in our last newsletter, our land was raw and mostly undeveloped. No garden beds. So what do we do? Build them, of course. We don't have any money to buy materials to make beds this year, but I like growing food in garden beds. Lately I've been learning about primitive ways to make perimeter fences and log cabins. I thought it would be fun to experiment with translating those principles into ways to make garden beds. These particular beds are being built on a slope. Because of this, we chose to make the beds 3-sided instead of four. The dimensions of the bed in this article are: 12 feet by 4 feet. In this article, I'll share with you what we've come up with using tools we already have on Strand Farm. Enjoy :)
First, we fell some trees and cut them into 12 ft. lengths. The trees were in close proximity to the 'upper island' which made moving them to their final resting spot much easier. Oak logs are heavy!
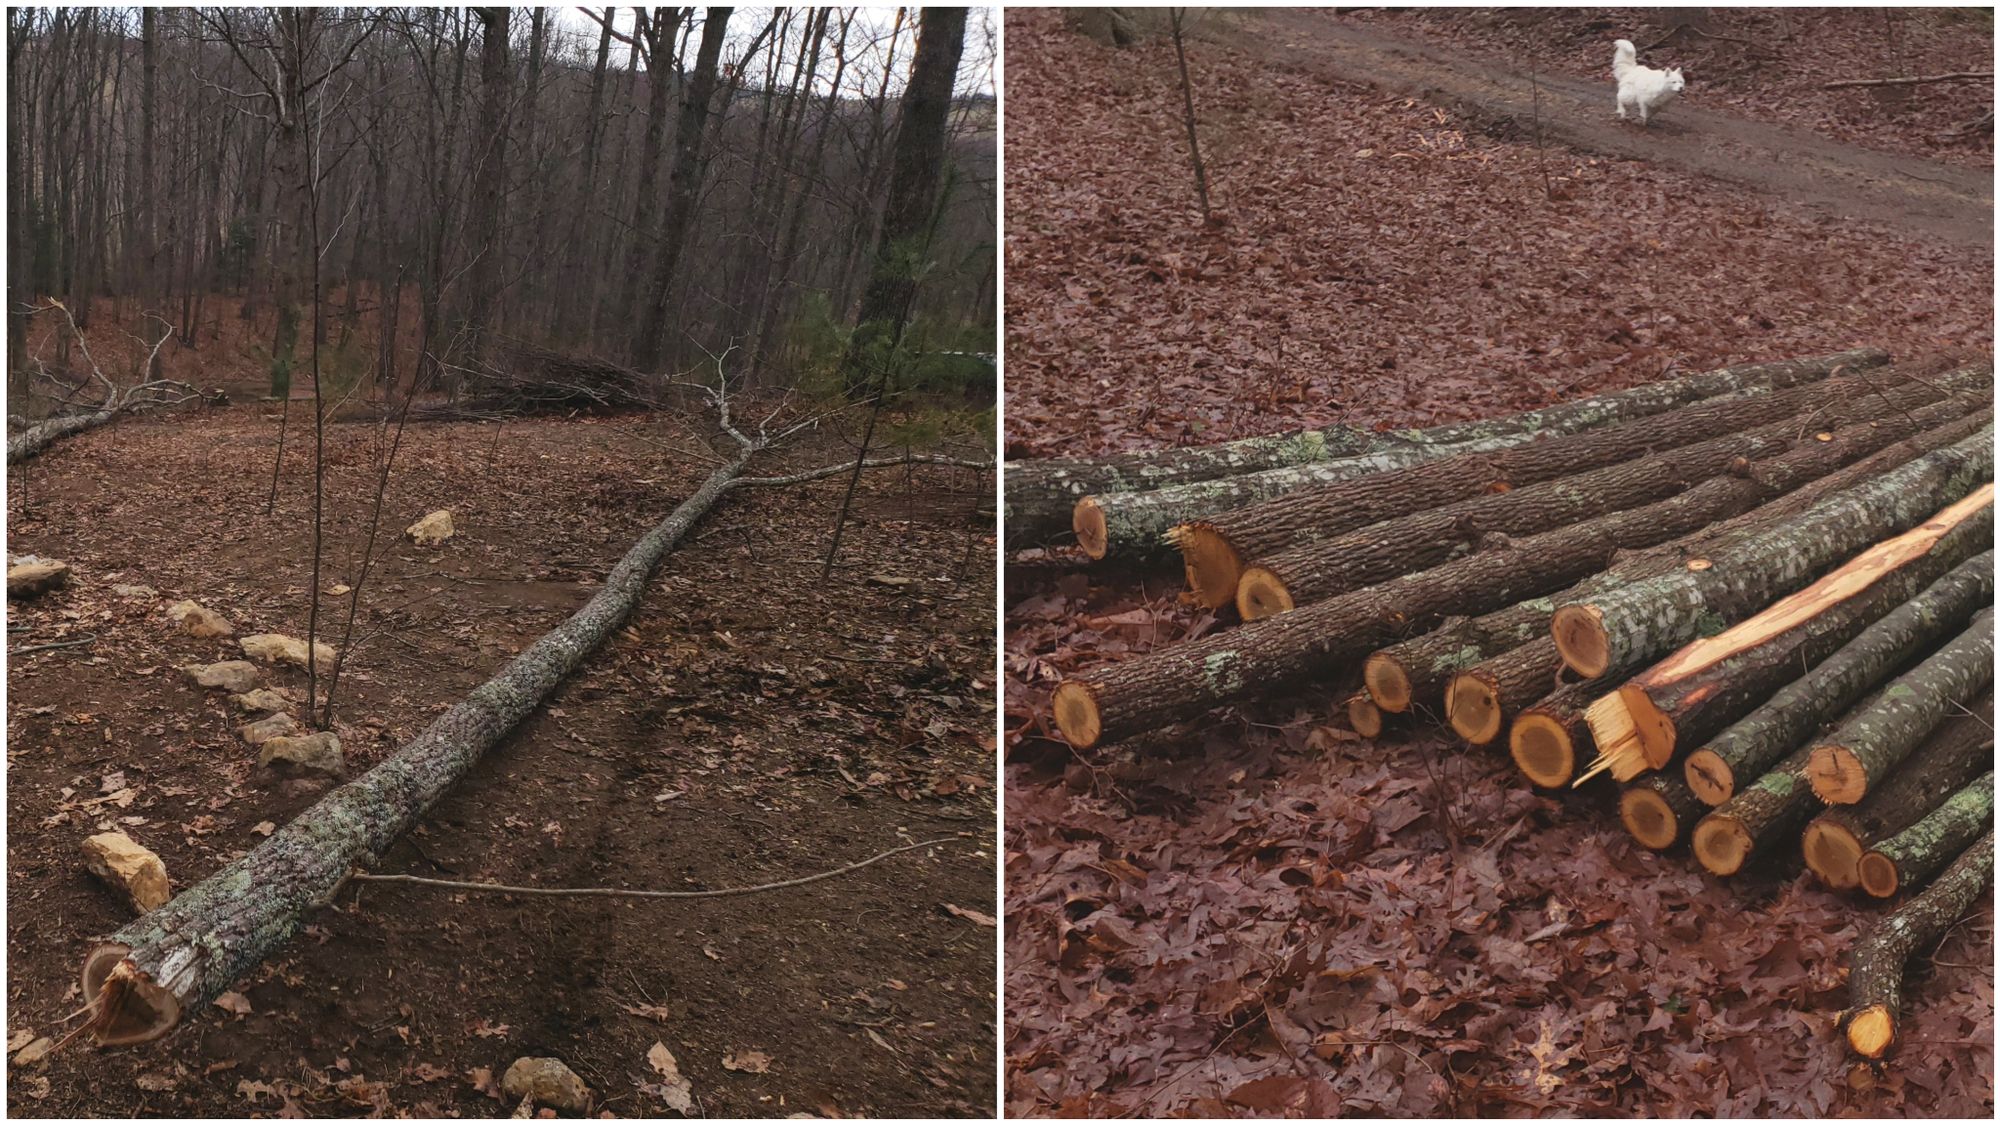
We split the logs in half [YouTube video click here] using two 5 lb wedges I recently picked up at our local Harbor Freight and an ol' beat up axe that was given to us by James' Dad - Thank you! The two work wonderfully together. Once split, we chose the spot where we wanted the bed to go and brought the logs over.
Since we've got to get a lot of beds made quickly and are experimenting with this style and layout, I chose not to strip the bark or shou sugi ban (a method of burning the exterior for preservation) them. They will not last as long due to this, but by the time they do break down, I'm sure I'll have other ideas of how I'll want to design our garden areas.
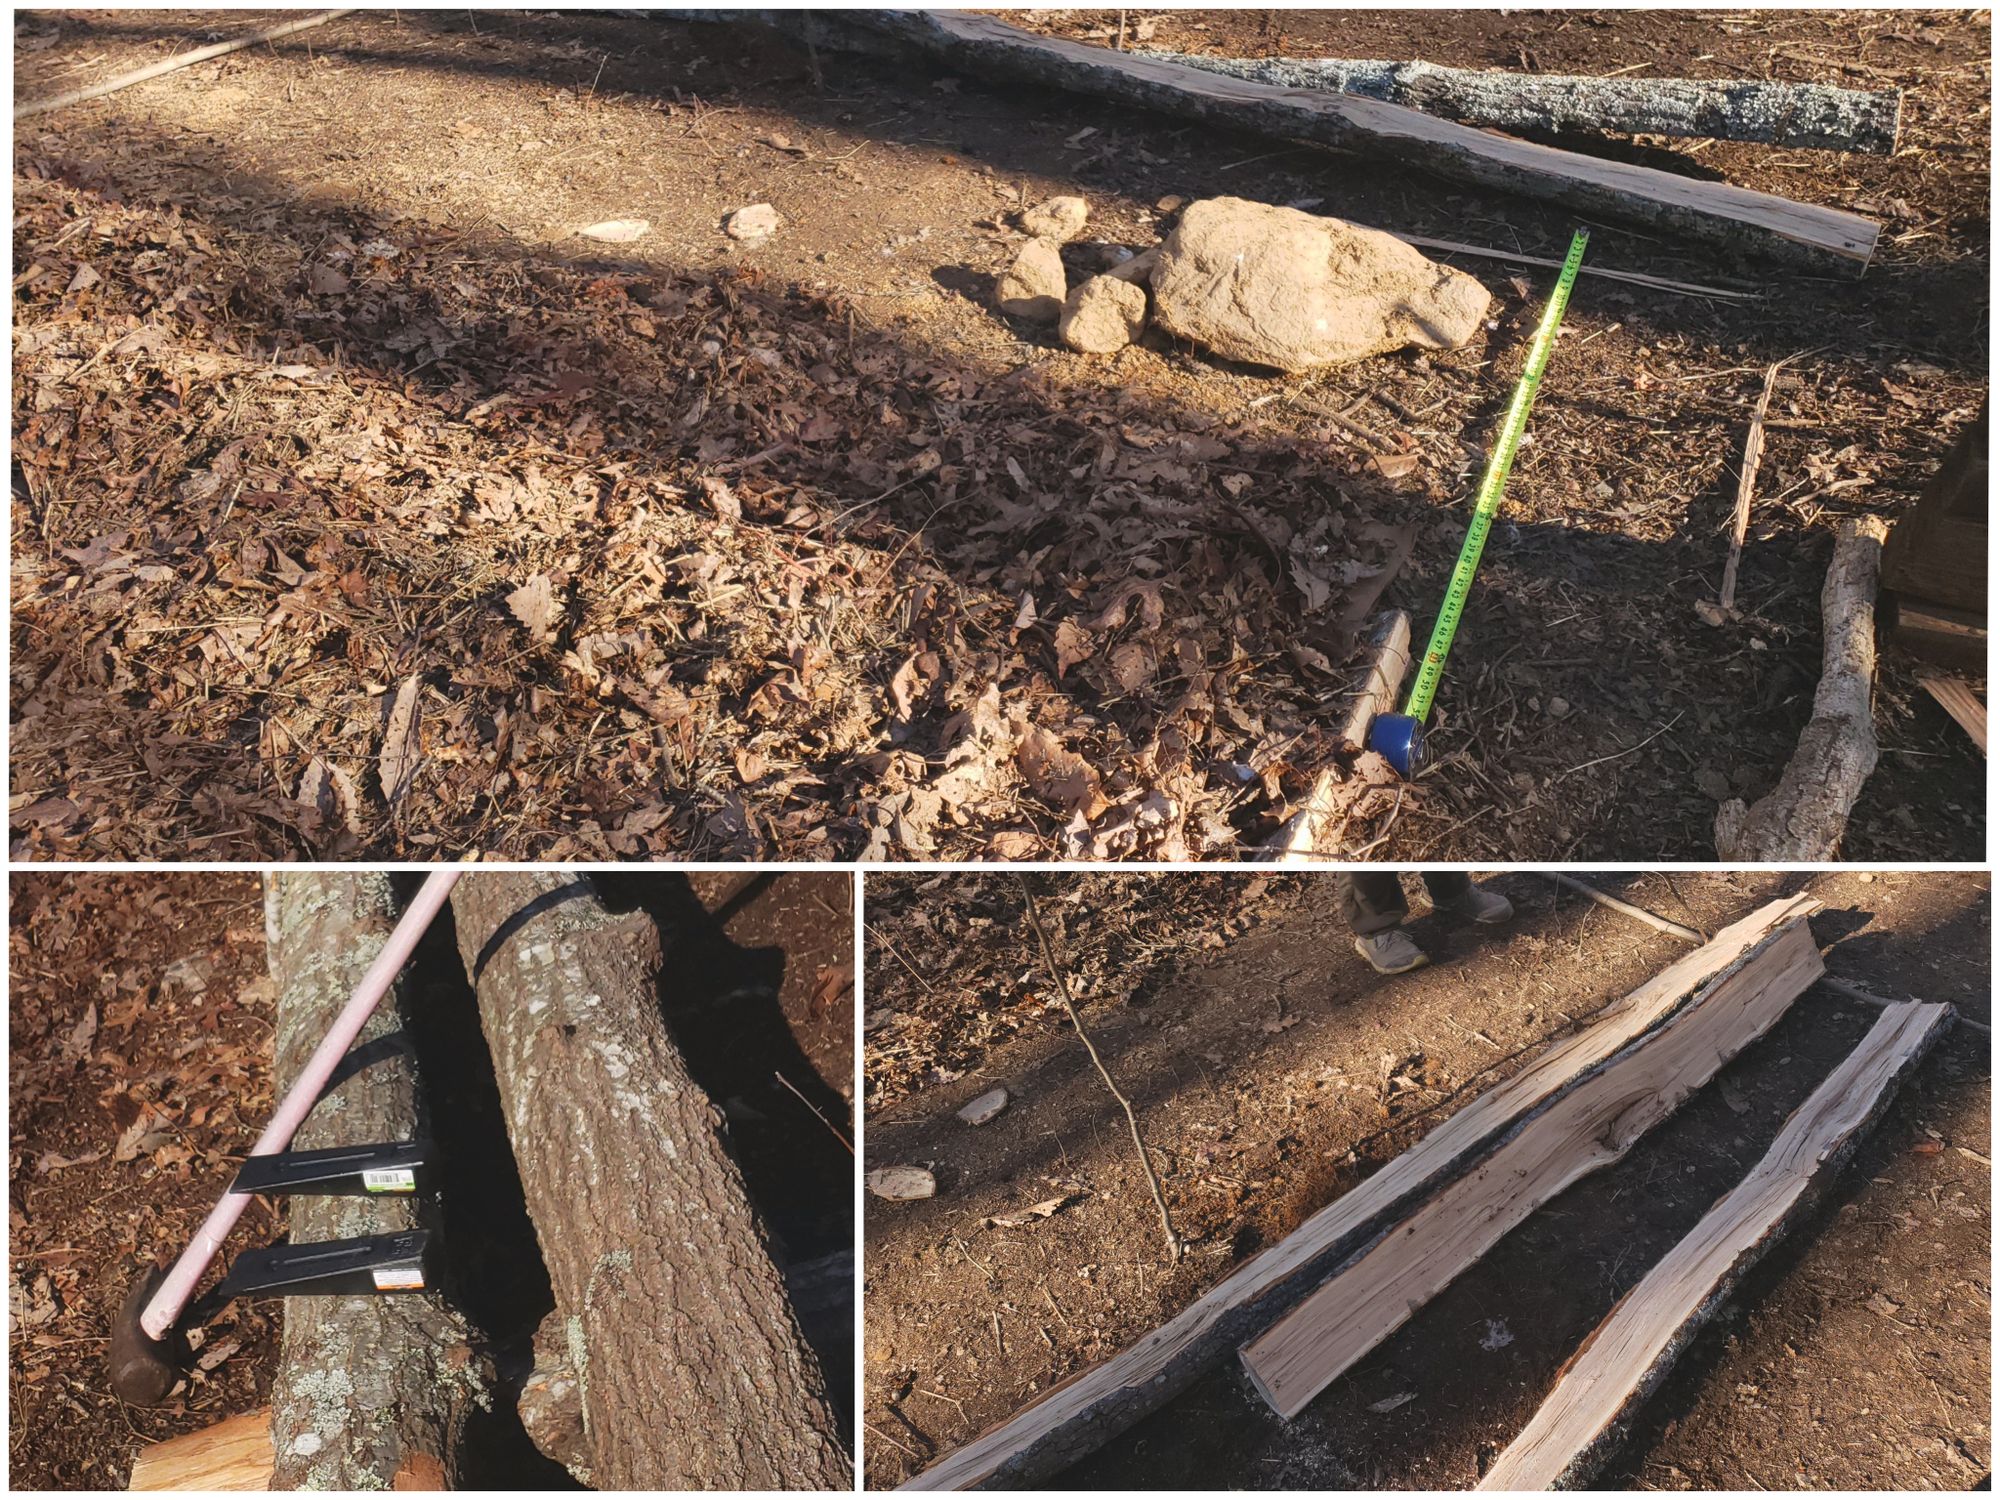
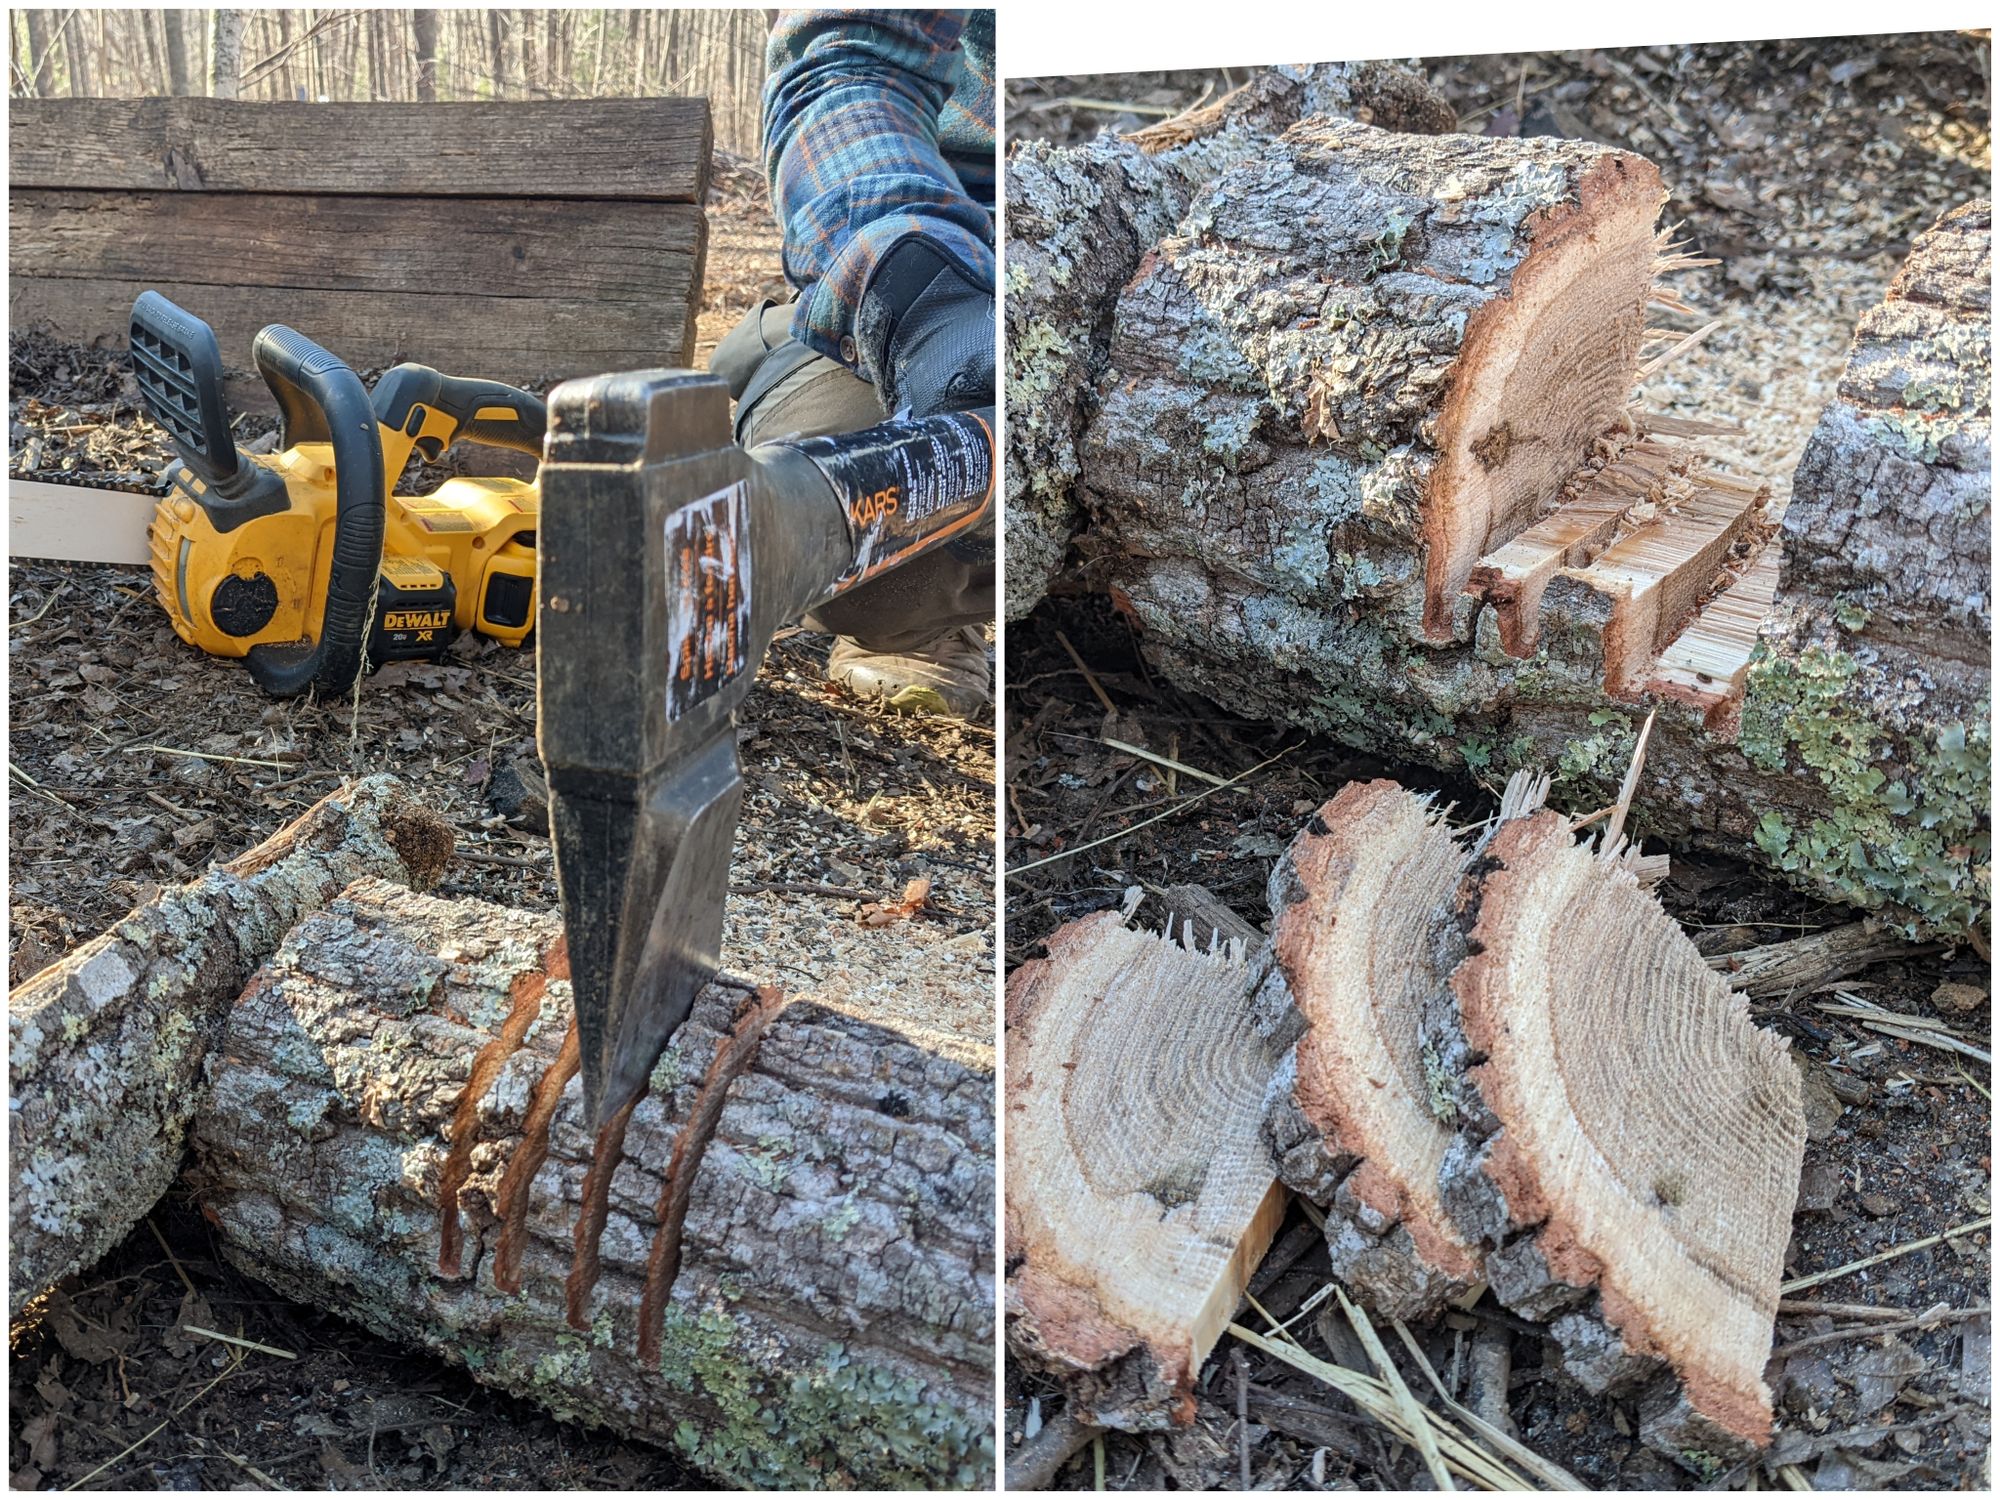
The next steps require notching the logs. We use our electric chainsaw for this. Simply use the 4 ft. side log's width to mark the 12 ft. base log. This is where you'll make the cuts on either side about half way down into the base log. After you've made those two cuts, go ahead and make a few more cuts in between.
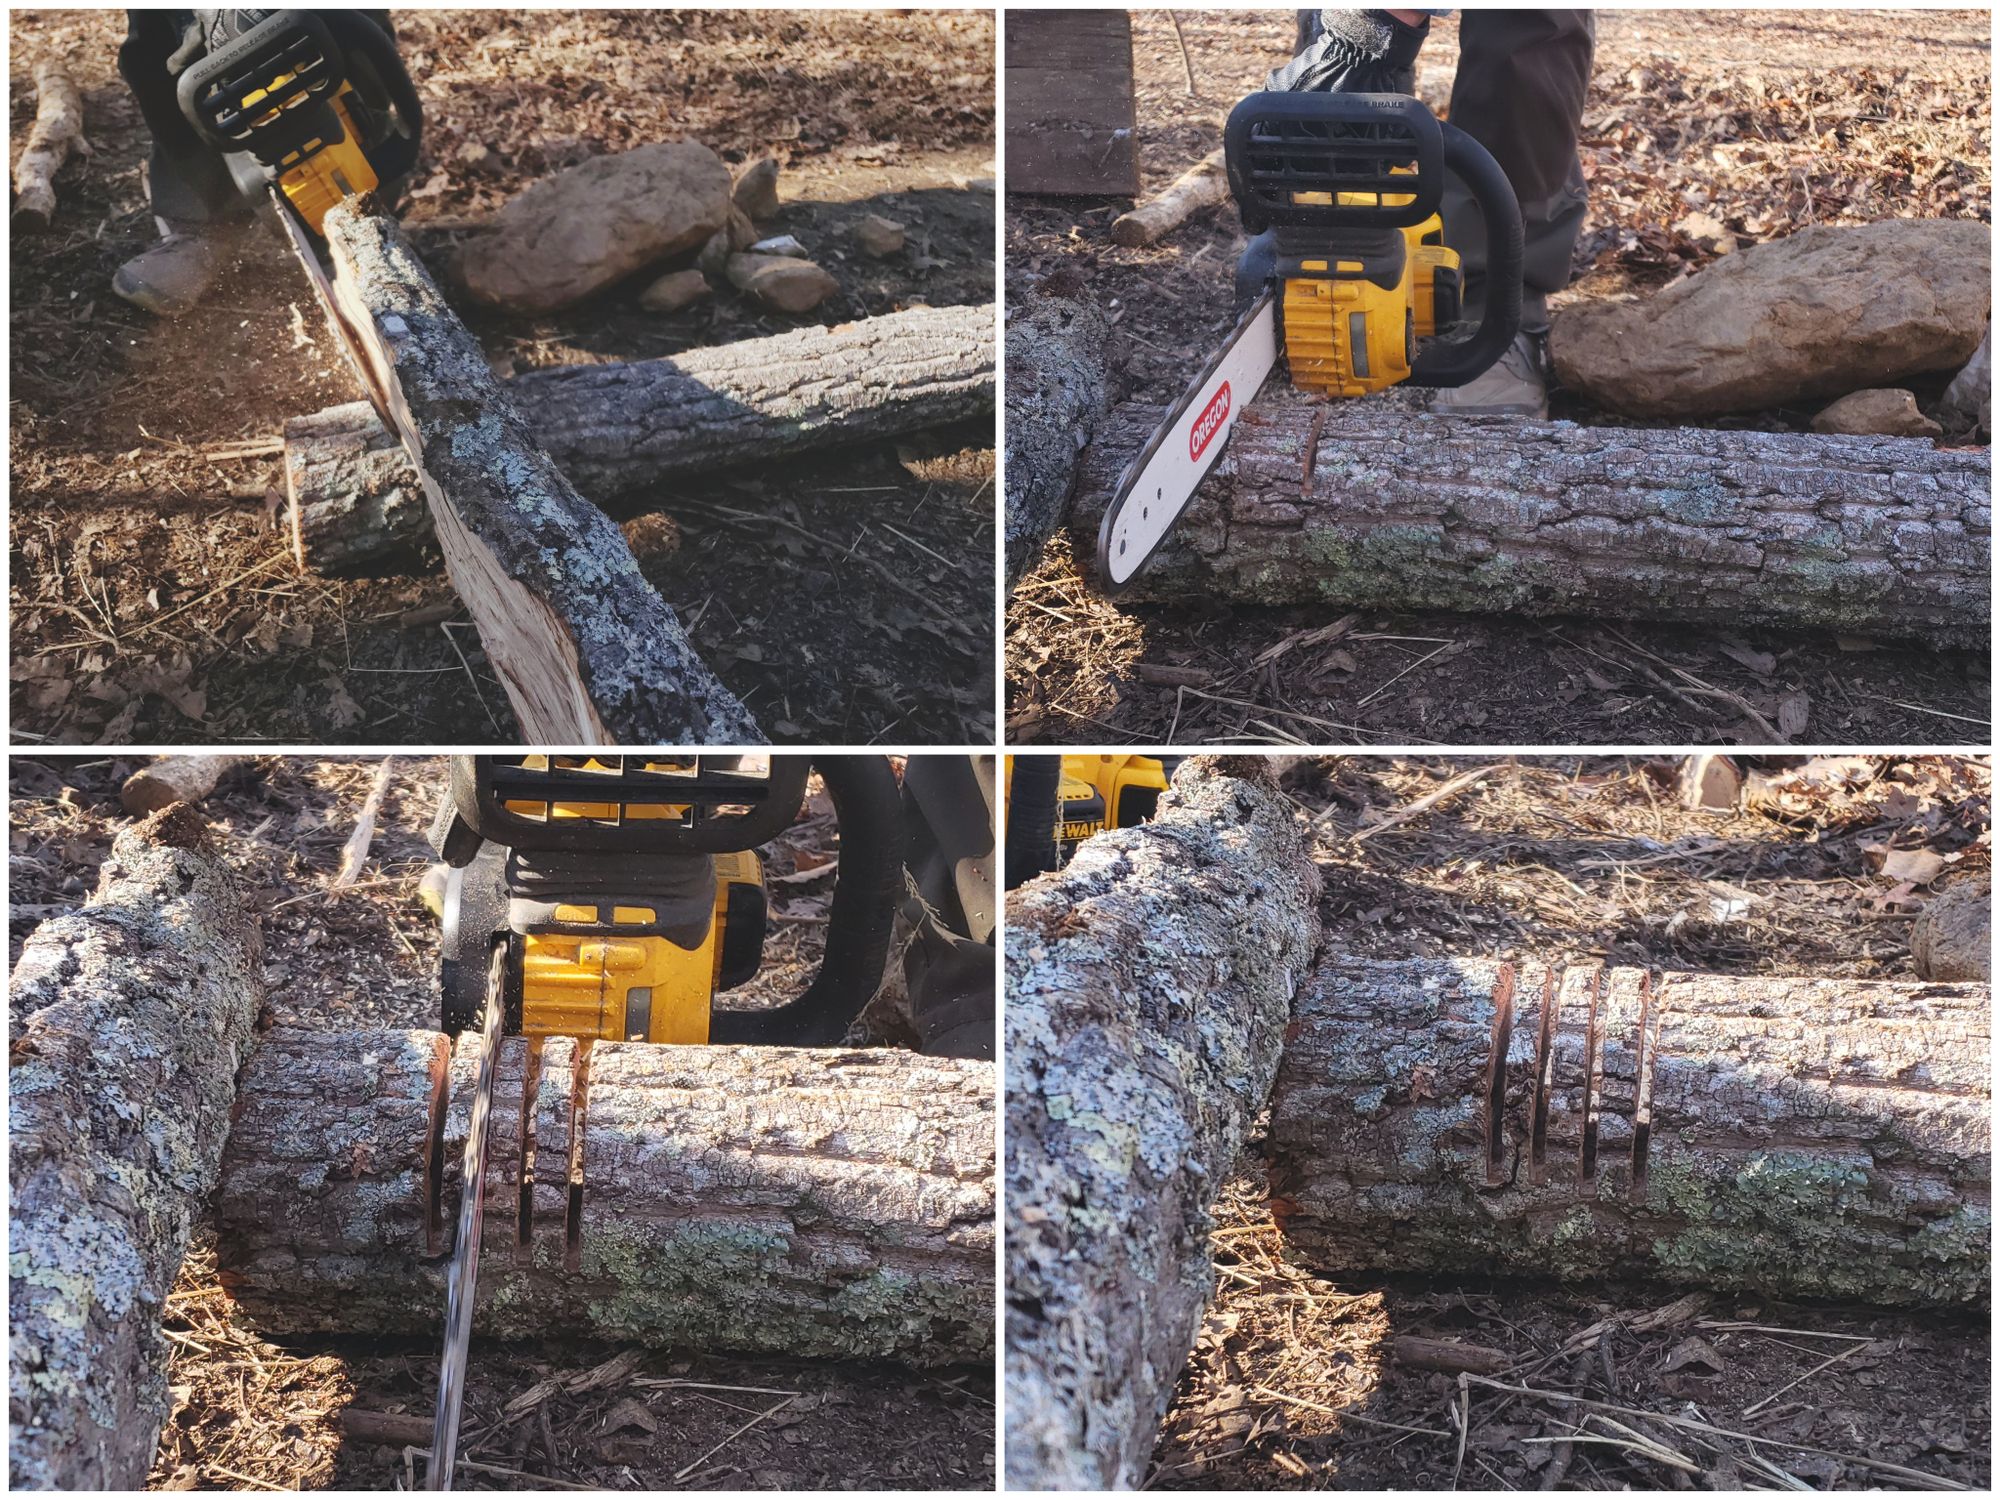
Once the cuts are made, use the axe to get the slices out. Talk about instant gratification :)
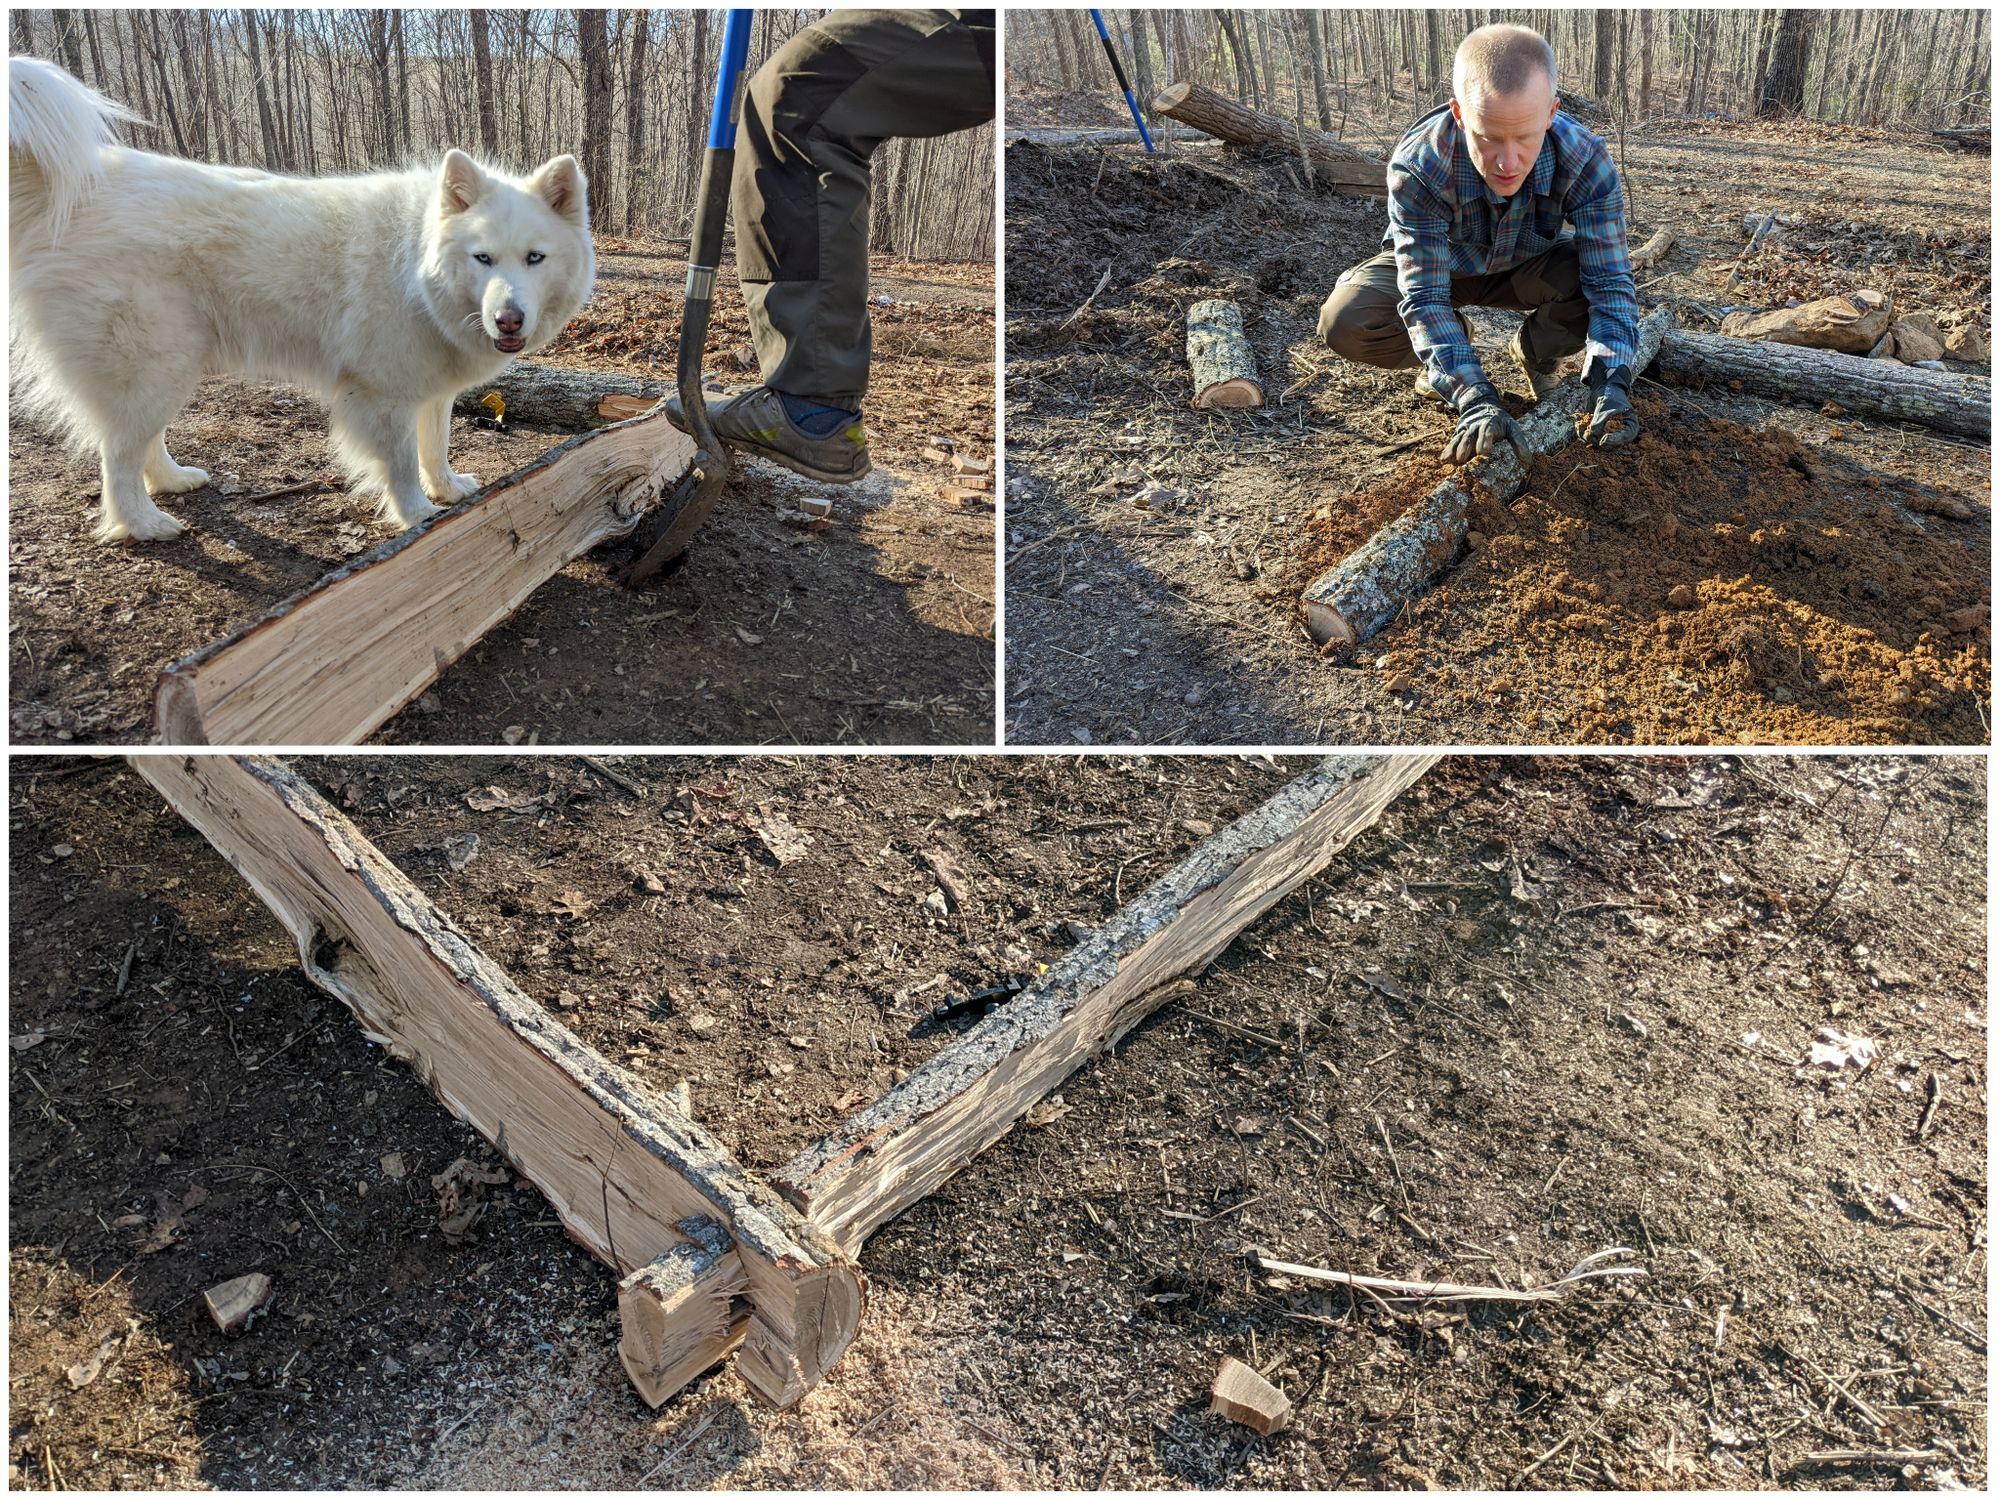
Now we will repeat this process 3 more times. Afterwards, we are ready to assemble the logs together. Once assembled, we level the ground as needed underneath any logs that don't sit right by shoveling away the dirt. Note: I like the look of the flat side of the log facing outwards. You could use the rounded side too. Personal preference really.
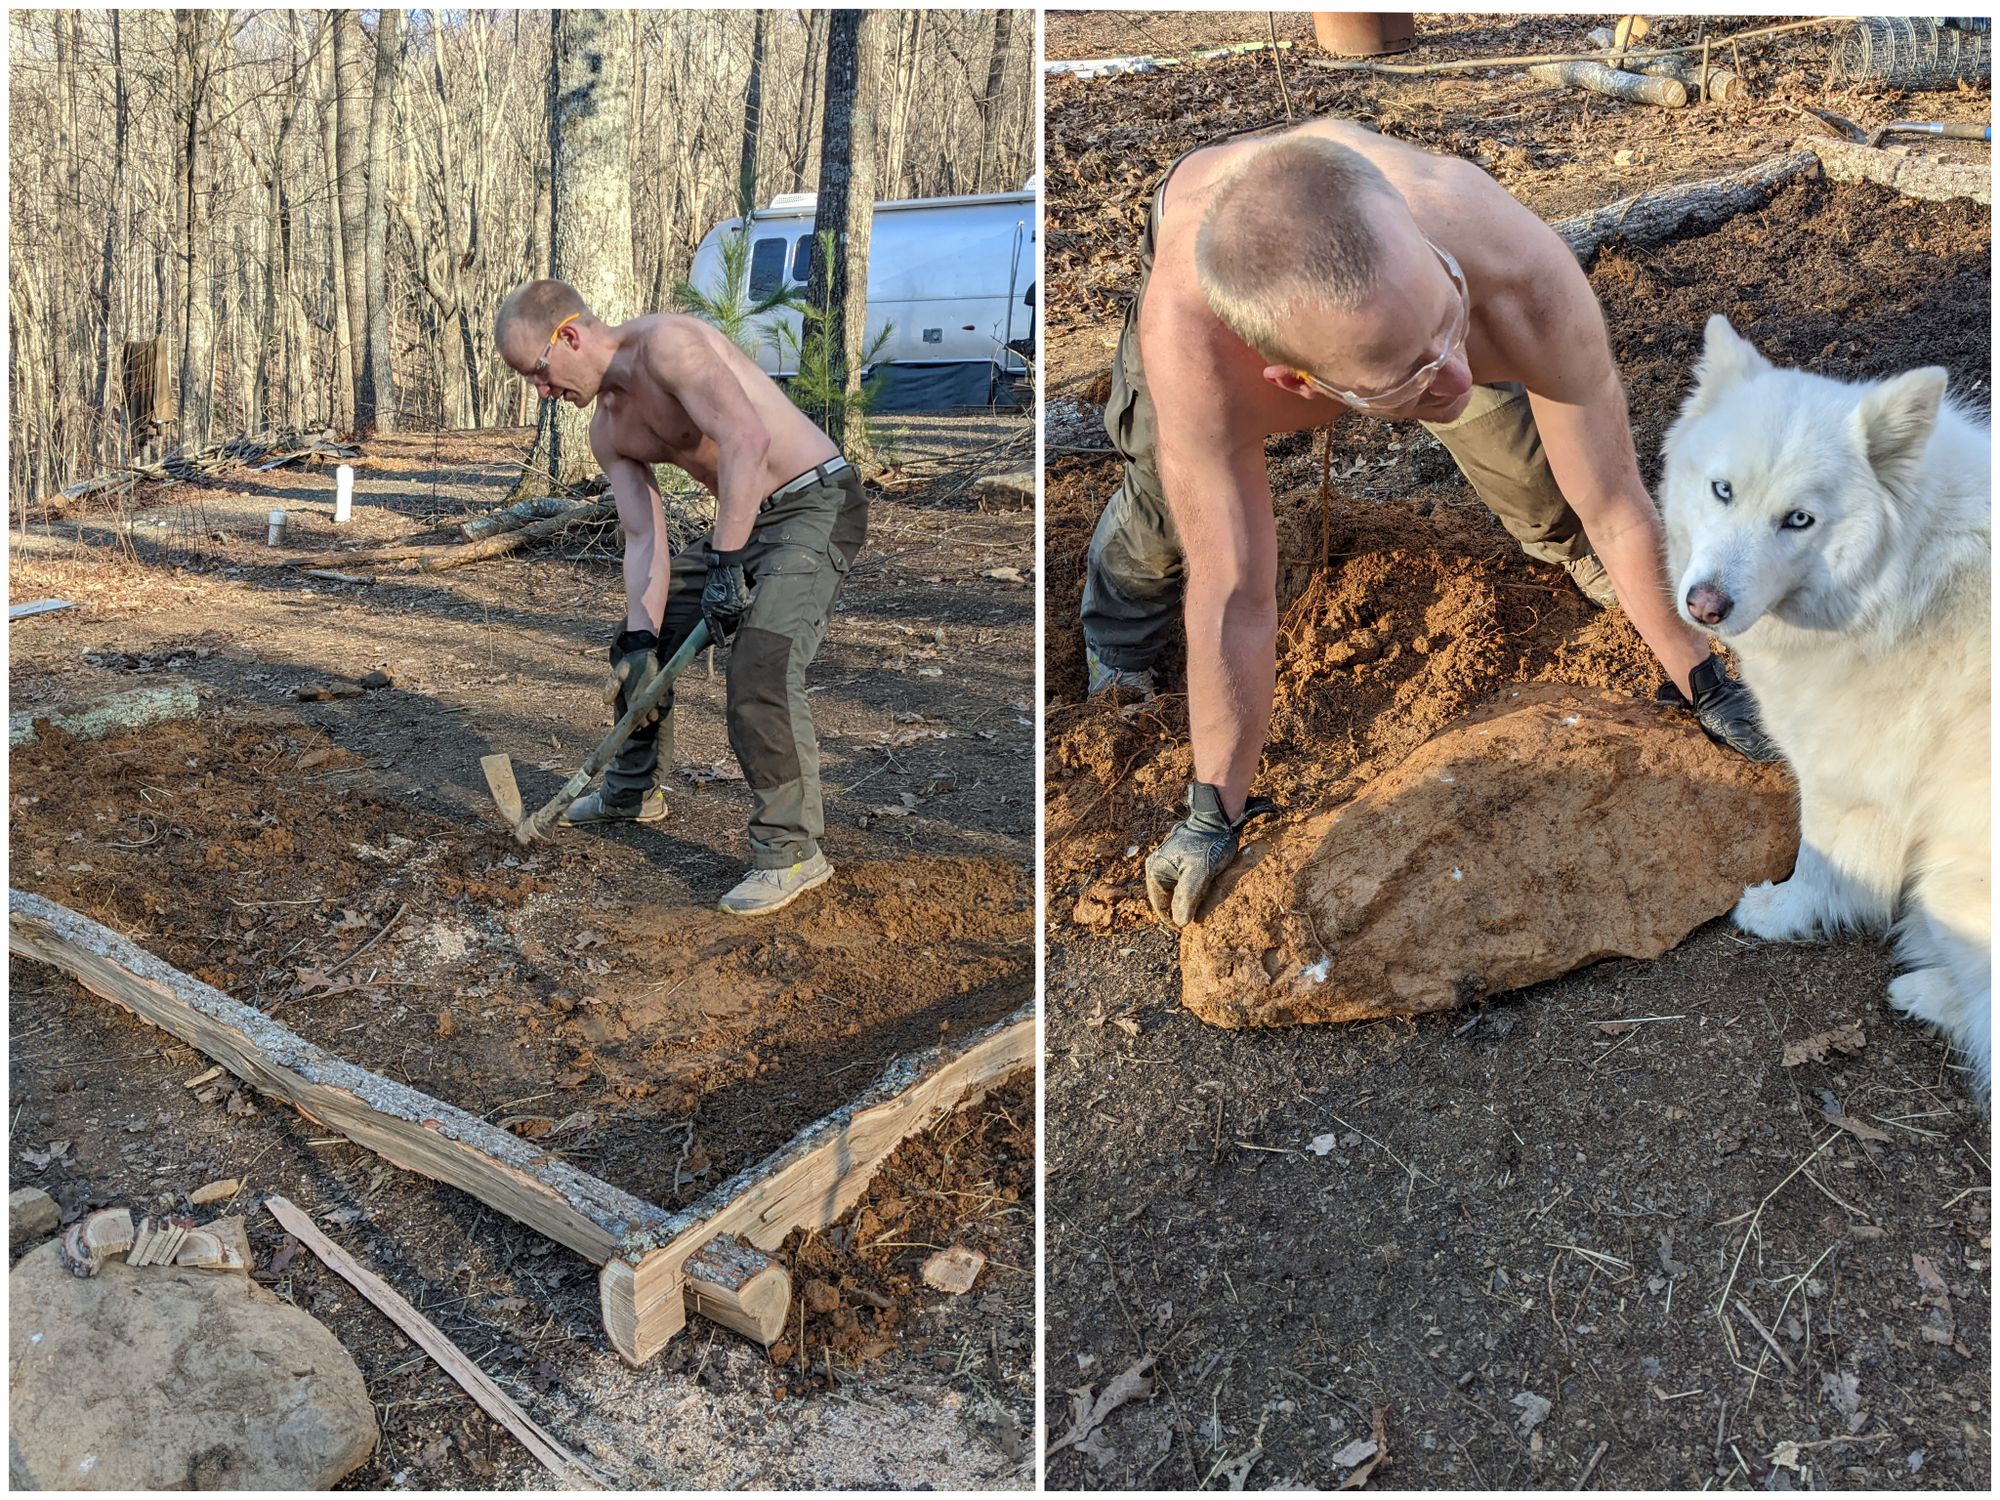
The ground inside the bed is more compacted than what we'd like for optimal growing conditions. To remedy this, James uses the pneumatic (Thanks Dad!) to aerate the soil. Unlike last year, when we dug up the earth when making our beds, we opted to go for more of a 'No Till' method. Ain't nobody got time for that!
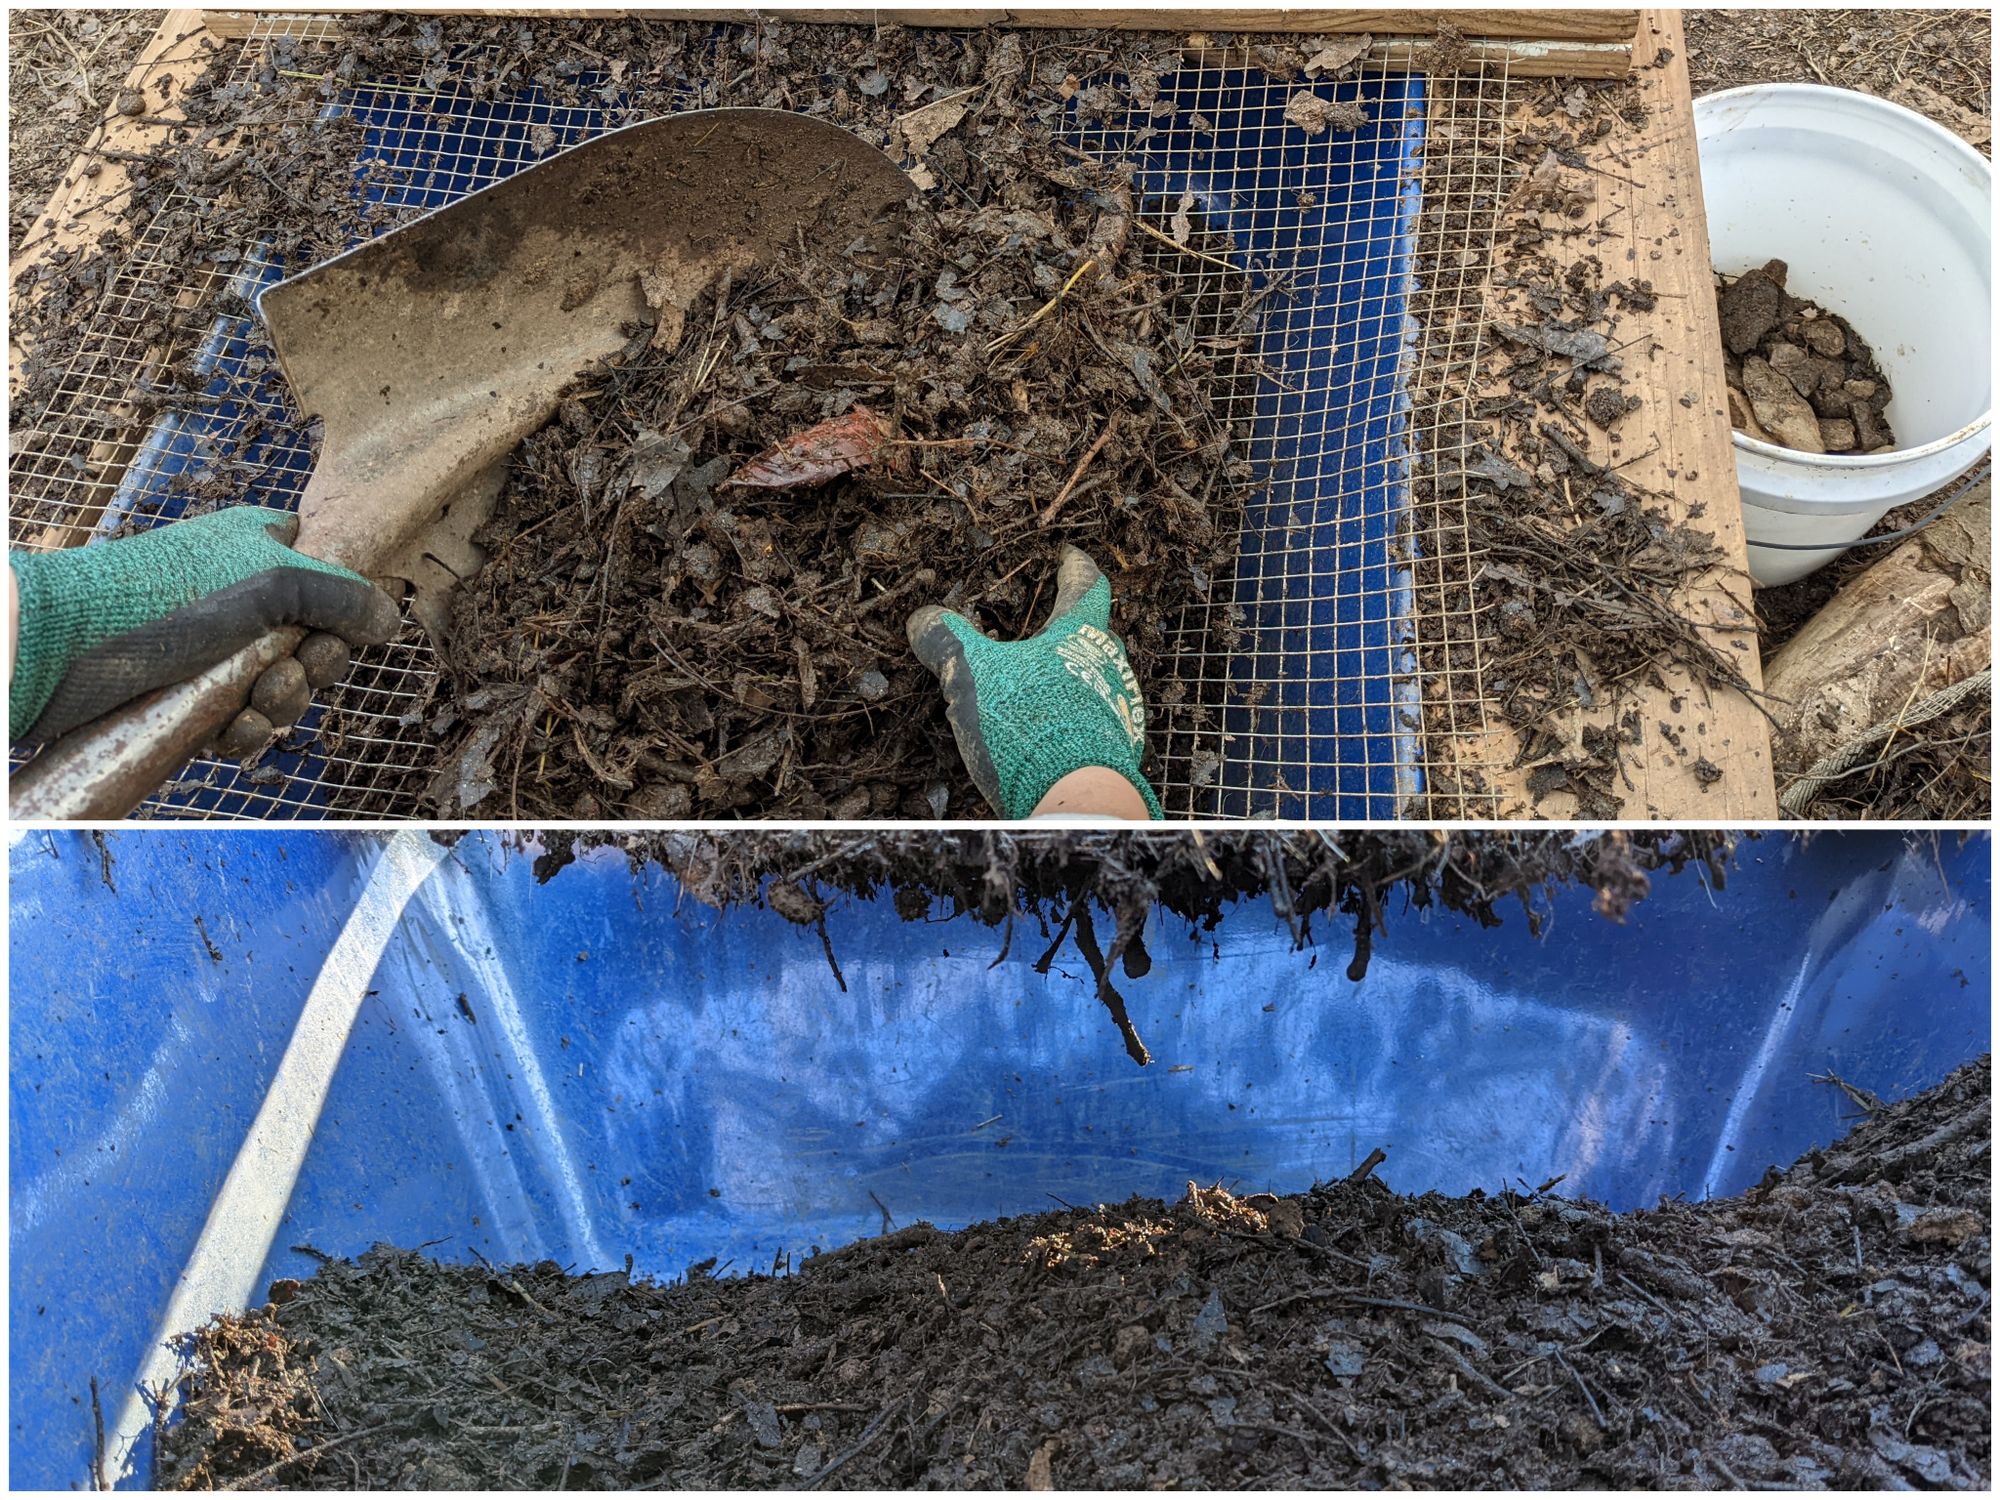
While James worked on that, I sifted compost from the massive pile adjacent to the beds. We knew we wanted to use this area for gardening from the get-go. Having compost right here makes life a lot easier.
Tip #1: Keep a rock bucket close by. Toss them in as you go. Use them later for other projects.
Tip #2: Sift your soil right into the wheelbarrow. When its full, take it to your bed and dump it in.
If you'd like to know more about where we learned to compost with chickens, click here.
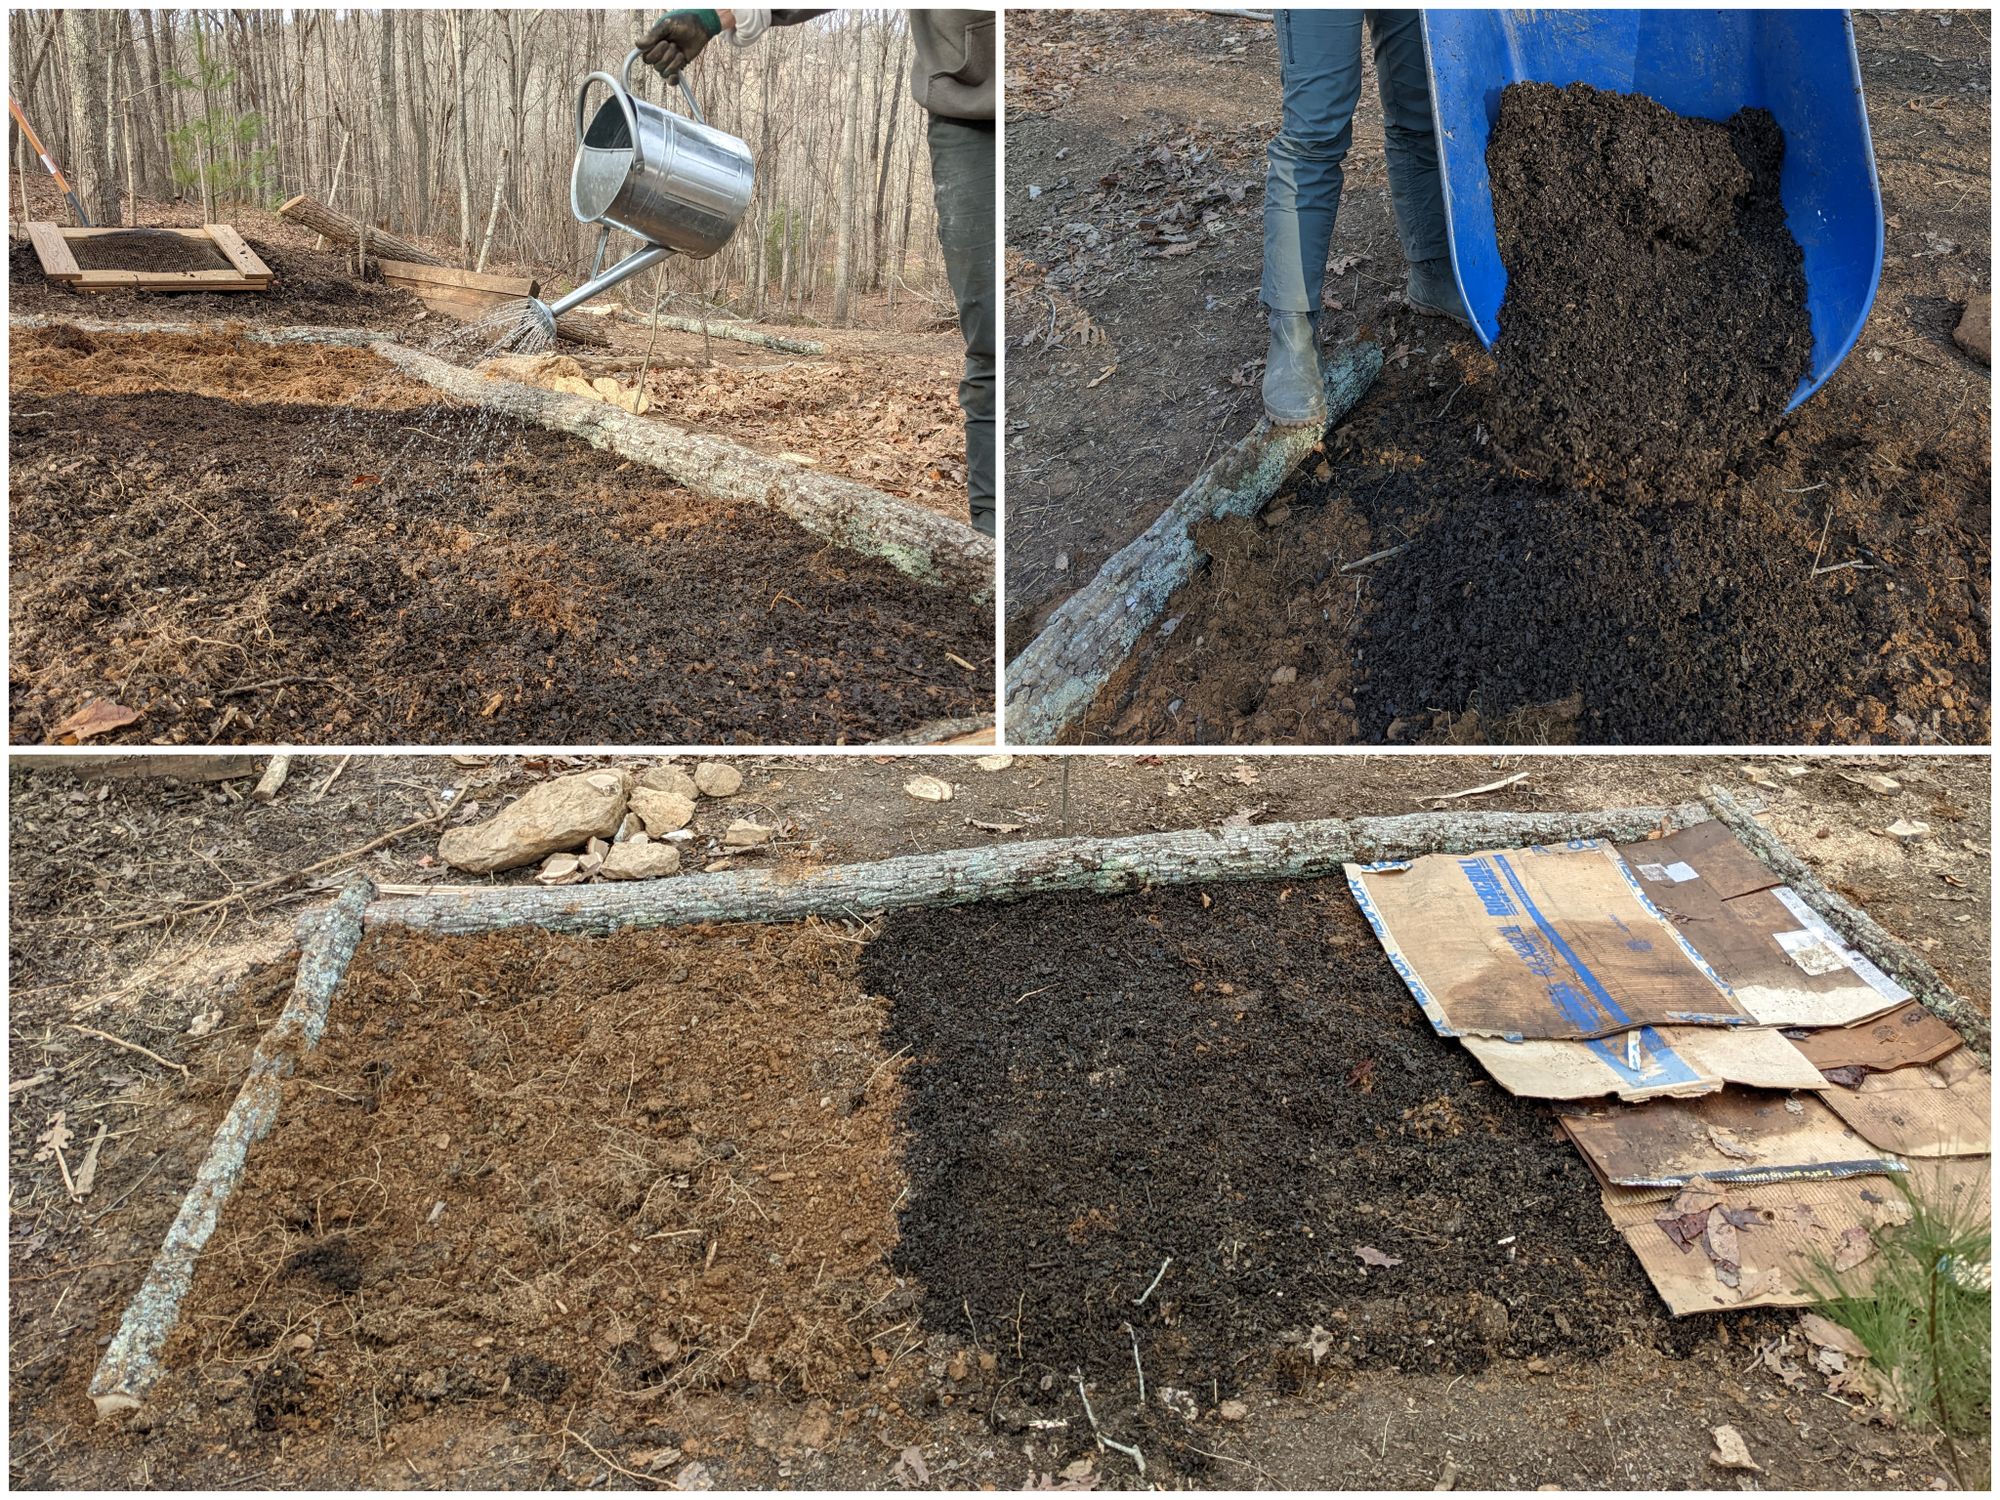
For our garden beds, we add a layer of compost on top of the soil then water it in. Next, a cardboard layer to prevent weeds from growing through. This cardboard has been outside in the rain so it's already moist and starting to break down. When layering on a slope, shingle them by starting up hill first. This way, water can seep underneath easier. Finally, we cover the entire thing with leaves as a mulch layer. This helps to keep in moisture.
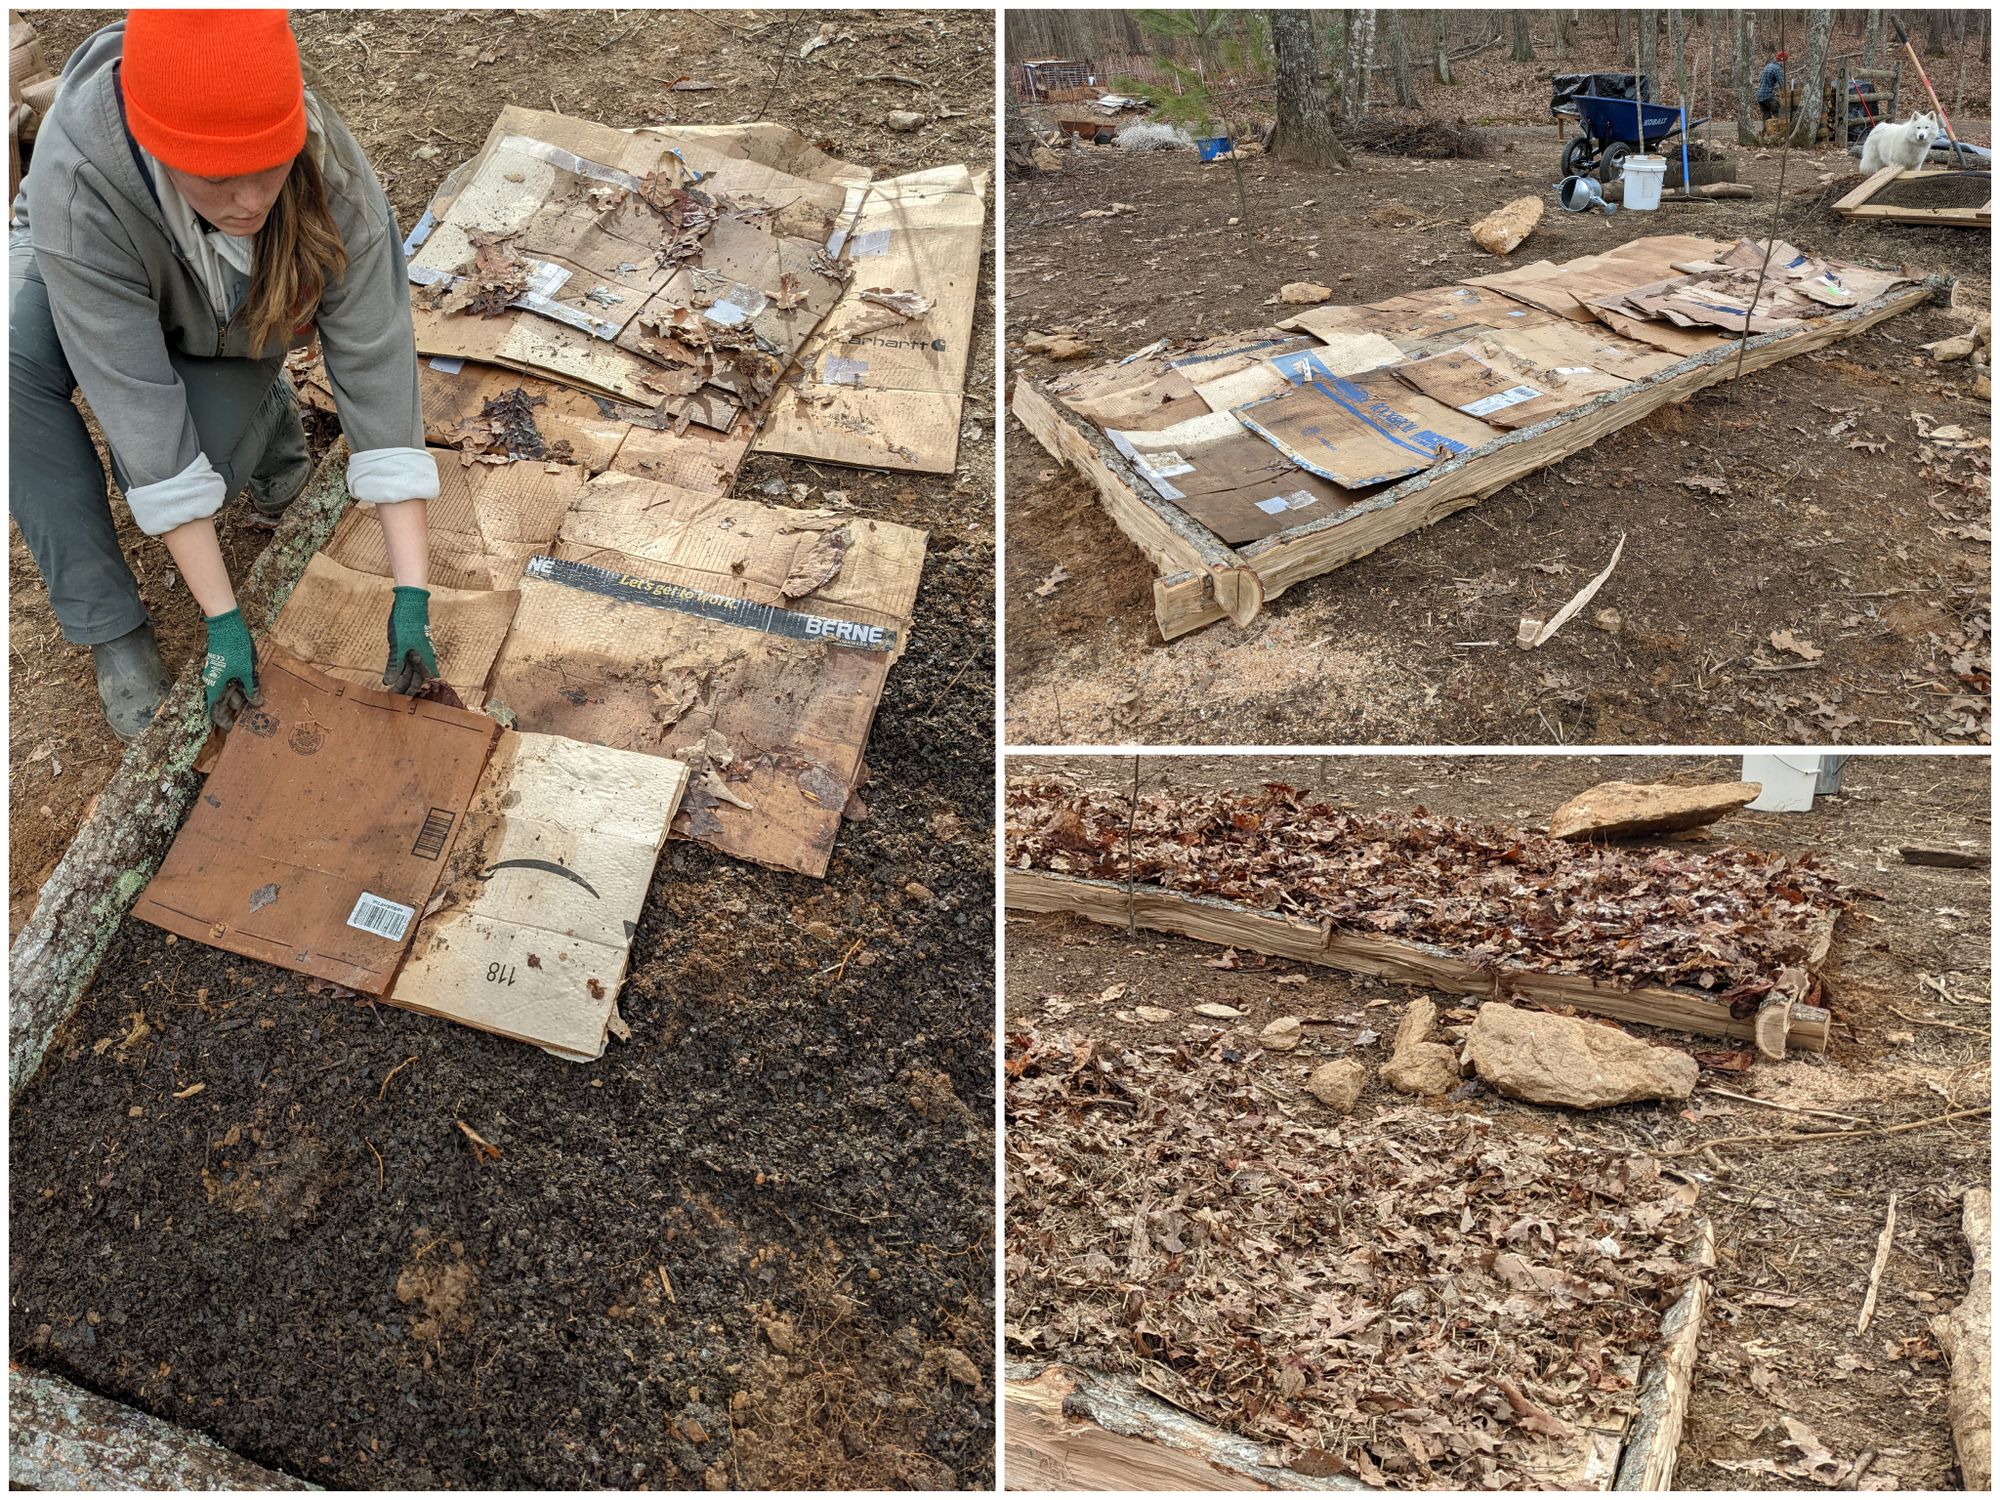
Just like that, we have a garden bed! To be quite honest, it took wayyyyy more time for me to write this blog post than it would be to make another garden bed. Internet is very slow around Strand Farm. Oh well! I hope you enjoyed our process. Please send me an email at ashley@strand.farm. I'd love to know your thoughts or answer any questions you may have. I hope everyone is having a great week! We'll see yall next Tuesday :)